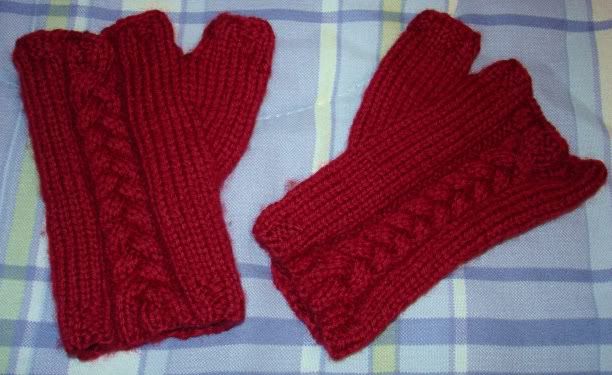
Yarn: 1 skein Knitpicks Merino Style www.knitpicks.com
Needles: US 5 dpns (set of four)
Notions: Yarn needle, waste yarn or stitch holder, cable needle, stitch marker
Gauge: 6 stitches and 9 rows per inch in stocking stitch (row gauge is less important)
Left Hand Glove:
CO 44 stitches over three dpns. Join, being careful not to twist the stitches. Place a marker at the beginning of the round. Work five rounds in k2p2 rib.
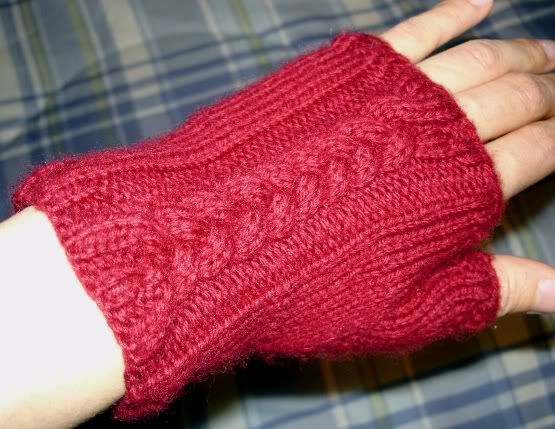
At the beginning of the next round, switch to st stitch for 14 stitches. P3, K9, P3. Finish the round in st stitch. Repeat this round one or two more times.
In the next round, when you reach the 9 separated knit stitches, begin the braided cable. Move the first three knit stitches to a cable needle, and hold to front. Work the next three knit stitches, then the three from the cable needle. Work the next three knit stitches, then p3, then finish the round in st stitch.
On the next round, work all stitches as they lie (purl the purls, knit the knits).
On the next round, begin the other part of the braided cable when you reach the 9 separated knit stitches. Work the first three in knit. Then slip the next three to the cable needle and hold to back. Work the next three in knit, then the three off of the cable needle. P3, then finish the round in st stitch.
On the next round, work all stitches as they lie.
These four rounds form the cable repeats. So you are actually cabling every other round. Continue in this manner until there are about two inches of work (counting the ribbing).
Next round: Work six stitches, then M1, K1, M1. Continue in established cable pattern.
Next round: work all stitches as they lie. The increases should be knit.
Next round: Work six stitches, then M1, K3, M1. Continue.
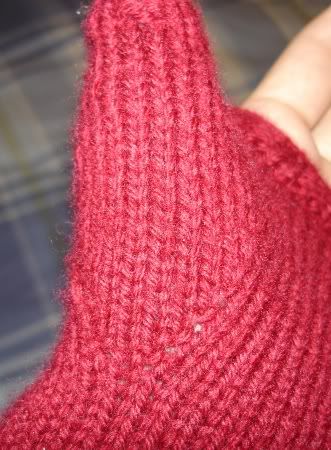
Continue in this manner until you have increased 8 times. (That is, when you get to the beginning of the gusset on an increase round, M1, knit the previous increase stitches, M1, continue.) In the next round, when you get to the beginning of the gusset increases, transfer the next 16 stitches to a holder or waste yarn. Continue in the established pattern. In the next round, knit over the gap created by the gusset, leaving a hole for the thumb.
Continue in the established pattern until the work measures 5 inches total. Then switch to k2p2 ribbing (stopping the cable) for about 5 rounds. Bind off somewhat loosely.
Pick up the 16 stitches in the thumb, join and work in st stitch for about 1/2 inch. Switch to k2p2 rib for about 3 rounds. Bind off somewhat loosely.
Weave in ends and sew up the hole at the base of the thumb.
Right Glove:
Work as for left, but begin thumb increases 7 stitches AFTER the 3 purls from the end of the cable sequence. That way the thumb will be on the correct side! :)

3 comments:
Keep posting digital pictures! They're pretty & fun. The stuff you made looks great, Glor.
Thanks for sharing the pattern! They look really cute and not too complicated for me.
This is a great pattern to try!
Post a Comment