Nothing much going on here. I am waiting for an internet order of yarn to come in so I can start my next project. So I have just been crocheting a little bit. I've got a long weekend because all of my professors are Jewish and observe Yom Kippur.
I did read the next book in the Edwardian Mystery series by Marion Chesney, A Hasty Death. It feels like reading a story outline. Chesney doesn't bother to elaborate on ANY plot points. She just zips from one place to the next. It's really, really weird. One minute Rose and Harry, our protagonists, are breaking out of an insane asylum. The next they are at a country house party. Ten pages later they are confronting a crazed murderer. Because of this ADD-style, the characterization suffers. This is a shame, because the characters were the best part of the first entry in the series, Snobbery With Violence. Now I'm not sure what to expect from the next installment. These books are short (~200 pages), so I don't mind giving another a try. I just hope Chesney will slow down and take a breath in the next one. I would give this a 5.
Saturday, September 30, 2006
Monday, September 25, 2006
Quick Movie Review
I'm waiting for Adobe to convert a PDF to a text format so I can use the highlight tool in it. While that's running, I figured I should write a quick post.
I finally saw The Constant Gardner this past Saturday. I had been wanting to watch that one since last year. Anyway, I thought it was very well made and very compelling. Ralph Fiennes portrays a UK diplomat who inpulsively marries a young radical, played by Rachel Weisz (she won an Oscar for this role). Then, she is killed in Africa for sticking her nose in a corrupt drug company plot. Her husband pieces together what she was doing and continues her work, in the process discovering much about her, himself, and their relationship. It's a horrifying romantic movie, though it has a typically cynical Le Carre ending. (I have only ever read one book by John Le Carre, so I'm going more off of what I hear than first hand experience.) Ralph Fiennes's performance certainly makes the movie. I was also particularly taken with the use of color and focus to signal flashbacks. Overall, I would give it a 7.
I finally saw The Constant Gardner this past Saturday. I had been wanting to watch that one since last year. Anyway, I thought it was very well made and very compelling. Ralph Fiennes portrays a UK diplomat who inpulsively marries a young radical, played by Rachel Weisz (she won an Oscar for this role). Then, she is killed in Africa for sticking her nose in a corrupt drug company plot. Her husband pieces together what she was doing and continues her work, in the process discovering much about her, himself, and their relationship. It's a horrifying romantic movie, though it has a typically cynical Le Carre ending. (I have only ever read one book by John Le Carre, so I'm going more off of what I hear than first hand experience.) Ralph Fiennes's performance certainly makes the movie. I was also particularly taken with the use of color and focus to signal flashbacks. Overall, I would give it a 7.
Tuesday, September 19, 2006
Into the groove
So classes started this week. I am contemplating International Trade, Industrial Organization, Time Series, and Cross Section/Panel. That might be too much econometrics, but I do want to take these courses.
And I finished a short book, Snobbery With Violence by Marion Chesney. It's the first in the Edwardian Mystery series, featuring Lady Rose and Captain Harry Cathcart. I found Chesney's style very appealing, full of dead-pan humor and wit. But the book is only a little over 200 pages, and the mystery part didn't start until quite a ways in. I felt the pacing was off. I understand that Chesney was trying to introduce us to the characters and their lifestyles, but the ending was really rushed. But I am looking foward to seeing how the relationship between Rose and Harry progresses. Rose is a suffragette with very little understanding about how the real world works, while Harry is a world-weary war veteran. Of course the requisite sparks fly, but these are interesting characters who can rise above the somewhat cliched "opposites attract" situations. I would give the book a 6.
And I finished a short book, Snobbery With Violence by Marion Chesney. It's the first in the Edwardian Mystery series, featuring Lady Rose and Captain Harry Cathcart. I found Chesney's style very appealing, full of dead-pan humor and wit. But the book is only a little over 200 pages, and the mystery part didn't start until quite a ways in. I felt the pacing was off. I understand that Chesney was trying to introduce us to the characters and their lifestyles, but the ending was really rushed. But I am looking foward to seeing how the relationship between Rose and Harry progresses. Rose is a suffragette with very little understanding about how the real world works, while Harry is a world-weary war veteran. Of course the requisite sparks fly, but these are interesting characters who can rise above the somewhat cliched "opposites attract" situations. I would give the book a 6.
Wednesday, September 13, 2006
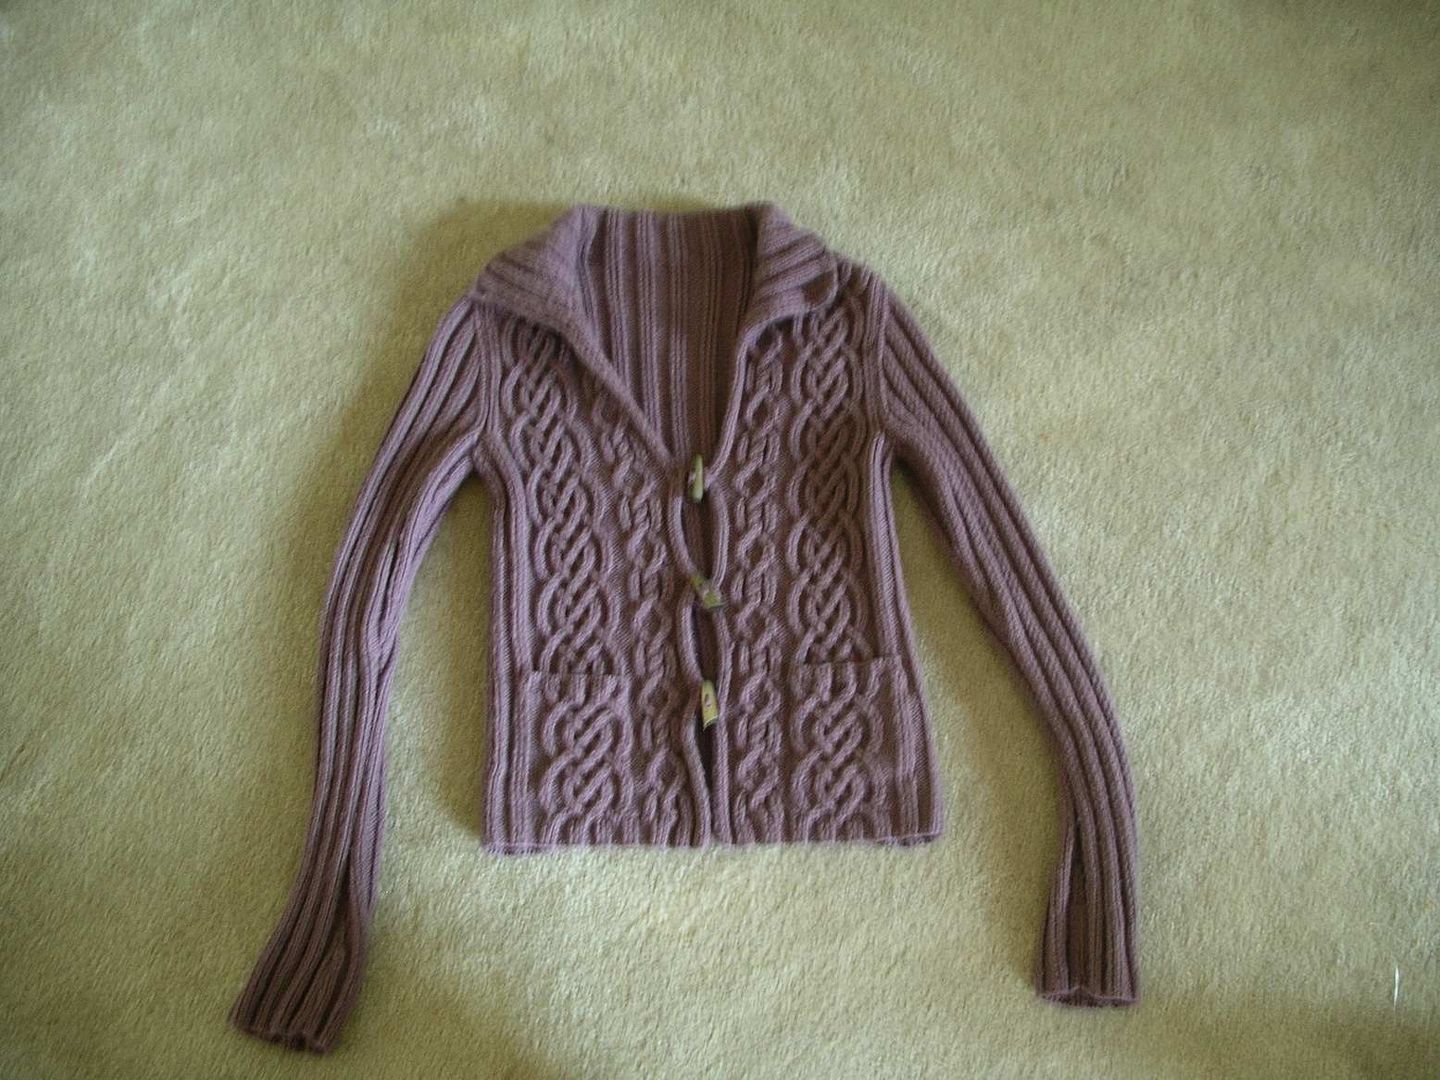
Red Sweater: Finished
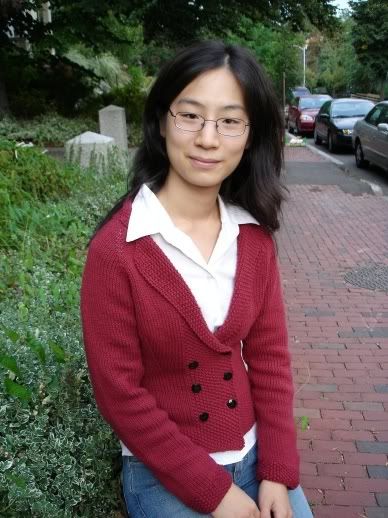
That's all, folks! I would probably make some more modifications if I were to do this again, but it was a positive experience overall.
Yarn: 10.5 balls Knitpicks Mainline
Pattern: My own (top-down raglan)
Needles: US 8 (Denise interchangables, then dpns for the sleeves)
As I have mentioned before, this was supposed to be the Something Red sweater from Knit and Tonic, but after a running out of yarn fiasco, I switched gears to this.
Oh, and here's the back view.
***Edited to add the pattern!
Red Blazer
Finished Size: The sweater is a small, measuring 33" across at the bust. My bust measurement is just under 32", and it fits me with a dress shirt underneath.
Materials:11 balls of Knitpicks Mainline (82 yards/50 grams, 75% pima cotton, 25% merino wool)
1 29” US 8 circular needle
1 set of US 8 dpns (for the sleeves, you could also magic loop these)
6 0.75” buttons
Gauge;4 stitches/6 rows per 1” in st st
The Collar:Using the circular needles, CO 57 stitches. Work in seed stitch for 2”. At the beginning of the next row, ktog. Work the rest of the row in seed stitch until you get to the last two stitches. Ktog. Work the next row in seed stitch. Repeat these two rows four more times, so that you have decreased a total of 10 stitches, 5 at each end. Break the yarn.
The Neck:Using the same needle you were knitting on before, CO 8 stitches. Then pick up 7 stitches along the slanted edge of the collar. Purl across the live collar stitches. Pick up 7 stitches along the other slanted edge of the collar, then CO 8 more stitches using a cable cast on. Start the raglan:Seed stitch across the first 15 stitches. Knit 2. M1, K1, M1, knit 7, M1, K1, M1, knit 25, M1, K1, M1, knit 7, M1, K1, M1, knit 2. Seed stitch across the last 15 stitches. On the next row, seed stitch the first 15 stitches, purl until the last 15 stitches, seed stitch these last 15 stitches. Repeat these two rows until the raglan armholes fit around your arm.
Divide out the sleeves:Work in pattern until your first raglan increase, knit across the three raglan increase stitches (where you were doing your M1, K1, M1’s before), transfer the sleeve stitches to a holder or waste yarn, knit across the next three raglan increase stitches (where you were doing your M1, K1, M1’s before). Knit across the back until the next raglan, knit across the three raglan increase stitches (where you were doing your M1, K1, M1’s before), transfer the sleeve stitches to a holder or waste yarn, knit across the next three raglan increase stitches (where you were doing your M1, K1, M1’s before). Finish the row in the established pattern.
Work the body:On the next RS row, begin the bust decreases. Seed stitch the first 15 stitches, then knit the next 13. Then perform a double vertical decrease: “Insert the right needle into the next two stitches as if to ktog, and slip them to the right needle. Knit the next stitch on the left needle. With the left needle, pull both slipped stitches over the stitch” (Vogue Knitting Quick Reference pg 21). Knit through the back, and do this decrease again on the other front. Work the WS in pattern (without any decreases). Repeat these two rows once more. Then repeat the vertical decrease every four rows 5 more times.
AT THE SAME TIME work underarm decreases: one inch after dividing for the armholes, ktog 9 stitches before the armhole join, and ktog in the same manner after the armhole join. Repeat this under the other armhole. 8 rows later, ktog 7 stitches before the first armhole join, and ktog in the same manner after the armhole join. Repeat this under the other armhole. 8 rows later, ktog 5 stitches before the armhole join, and ktog in the same manner after the armhole join. Repeat this under the other armhole. 8 rows later, ktog 3 stitches before the armhole join, and ktog in the same manner after the armhole join. Repeat this under the other armhole.
AT THE SAME TIME, work three 2 stitch button holes starting 10 inches after the start of the body (measured from the neckline). These should be spaced 2 inches apart. Work even until the body is 4.5” shorter than your intended length.
Hip increases: Work 15 stitches in seed stitch and 16 in st stitch. M1, K3, M1, knit until there are 34 stitches left, M1, K3, M1, finish the row in pattern. 4 rows later, work 31 stitches, M1, K5, M1, and then work the back and the hip increase similarly on the other front. Continue to increase in this manner two more times, every 4 rows.
End border: Work in seed stitch for 2 inches. BO.
Sleeves: Transfer the sleeve stitches to dpns. Knit in the round for 1.5”. On the next round, ktog 3 stitches before the underarm join, and 3 stitches after the underarm join. Repeat this decrease round 2 rounds later, then 4 rounds later, then 7 rounds later, then every 10th round. Continue in this manner until the sleeve is 1.5 inches shorter than intended. Work in seed stitch for 1.5 inches, then BO. Repeat for the other sleeve.
Block as desired, and sew on the buttons. Three are used as decoration, to give a double-breasted effect.
Enjoy!
Tuesday, September 12, 2006
More sewing
My red sweater is finished blocking, but I haven't taken photos yet. I hope to have some soon, along with a write up of the pattern.
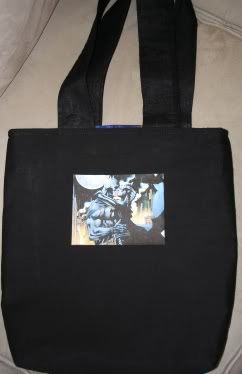
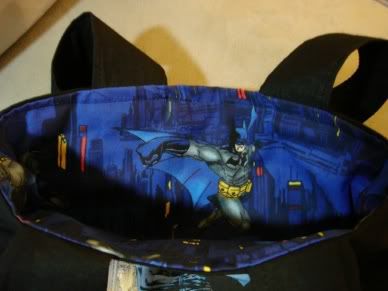
But meanwhile, I have been sewing a bit. I have gotten used to making tote bags, and I whipped up one last week that I thought looked decent enough to share. It's Batman themed, lined with Batman licensed fabric I got at Sewfisticated Fabrics and adorned with a Batman and Catwoman illustration by Jim Lee (from the Hush arc by Jeph Loeb). I like the size of this tote, and it's great for taking to the library, though really oversized books don't fit in it.
I also learned how to make sewn headbands this week, so I think I'll make a few for myself. I feel like that would be a cool fall accessory, now that I'm wearing my hair down again. (I have to tie it up in the summer, or else it drives me crazy).
Saturday, September 09, 2006
Fingers crosssed

I think I'm almost there. I may not end up liking the way I blocked the collar, so that could still create problems. But otherwise I may actually finish this sweater! If this works, I guess I can bury my complaints about the project. And by the way, wet wool/cotton smells a lot like wet dog. It makes me miss Mr. Puppy. (Also known as Jiminy, my parent's dog.)
Friday, September 08, 2006
Tutorial: T-Shirt Stenciling
Grumperina's post this morning inspired me to share my method for t-shirt stenciling. I have been stenciling for almost a year now, and I'm not great, but I have found what works for me.
Step 1: First you need a shirt, obviously. I always buy mine at a craft store, since I find that the “youth” medium size fits me. Make sure that the brand of shirt looks respectable (many craft stores carry Hanes, which work well). Other possible sources are discount stores like Target. But you probably don’t want a shirt that is ribbed. Stenciling on bumpy fabric is really hard. Cotton or cotton/poly blends are good choices.
Step 2: Wash the shirt to remove the sizing. A lot of people skip this step, but I have heard some people say that the ink doesn’t set as well if you don’t. I often also machine dry the shirt to see if it will shrink a lot.
Step 3: Pick your stencil. There are tons of great sources on the internet for stencils. The motherload is http://www.stencilry.org. I also sometimes download webdings fonts from http://www.dafont.com/. One thing to keep in mind is how difficult the stencil will be to cut (are there tons of little lines?). You also have to watch for “inversion.” This occurs when you cut out the negative space in a stencil and then paint the stencil as if these spaces are the positive ones. A better explanation, including diagrams, is here http://img411.imageshack.us/img411/1084/inverting4aa.jpg. If you cut out the dark spaces of a picture, you should paint these in a darker color than your t-shirt.
Step 4: Resize and print your stencil. You can copy a picture from the internet into a program like MS Word and resize as you choose. Then print it out on normal printer paper. Photoshop can help, but it isn't strictly necessary.
Step 5: Tape your stencil onto a piece of freezer paper. You should tape the stencil onto the papery side, not the wax side. Freezer paper is like one-sided wax paper. You can buy it at the grocery store, usually next to the wax paper. If you can't find it in the grocery store, they also sell it at craft stores for quilting and applique work. If you live near a Wegmens grocery store, I did find a 75 square foot roll of freezer paper there.
Step 6: Cut out your stencil, making sure to cut through both layers, printer and freezer paper. You can use an exacto knife or small scissors. I usually prefer the latter, as it is easier on my hands. But for some stuff, a knife will be needed. If you are using scissors, gently poke the tip through in a large space that you are cutting out (like we did in kindergarten to cut holes in the middle of paper). One thing to watch out for is “islands,” places where you don’t want to cut out a piece, but they are surrounded by space you do want to cut out. There are two ways to deal with these. One is to just cut these out and save them. Later you will attach them to your t-shirt in the appropriate places. The other is to leave “bridges,” strips of paper that connect these islands to the rest of the stencil. You will have to paint in these spaces left by these later. It’s your preference. I usually go with the bridge method, as I tend to lose the little pieces.
Step 7: Remove the printer paper from your freezer paper stencil (be careful to pick off all the tape or else it will get scorched). Iron your stencil onto your shirt where you want it, wax side down. The wax will stick to your shirt. You should set your iron on the appropriate heat setting for the t-shirt fabric you have. If you have any loose islands, iron them in the correct place. Make sure your stencil is really stuck on there.
Step 8: Paint! Using a sponge brush, dab fabric paint all over your stencil. Don’t brush it on, instead, dab in an up and down motion. Also, add paint gradually. Do not glob it on. You may need to do a few coats to get good coverage. Wait for it to dry.
Step 9: Peel off your stencil carefully. If you had bridges, carefully fill them in with paint. Heat set your paint with an iron if the bottle says to.
Done! Be careful when washing your custom shirt. I usually wash them inside out and hang them to dry.
Post pictures at craftster!
http://www.craftster.org/forum/index.php?board=140.0
Other tutorials:
http://72.29.83.164/~stencil/tutorials.htm
http://www.craftster.org/forum/index.php?topic=45311.0
Paint recommendations:
I have used both Speedball screen printing inks and Jacquard fabric paint. These work well, but you need to heat set them or they will just "sit on top of" the shirt and not bond to the fabric. Note that some brands of paint will not show up on dark fabrics.
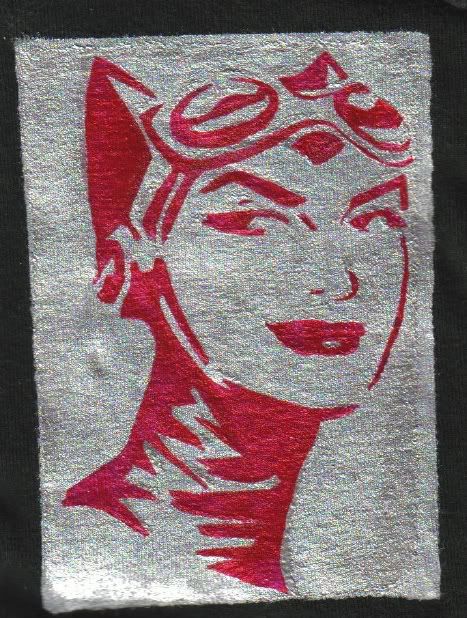
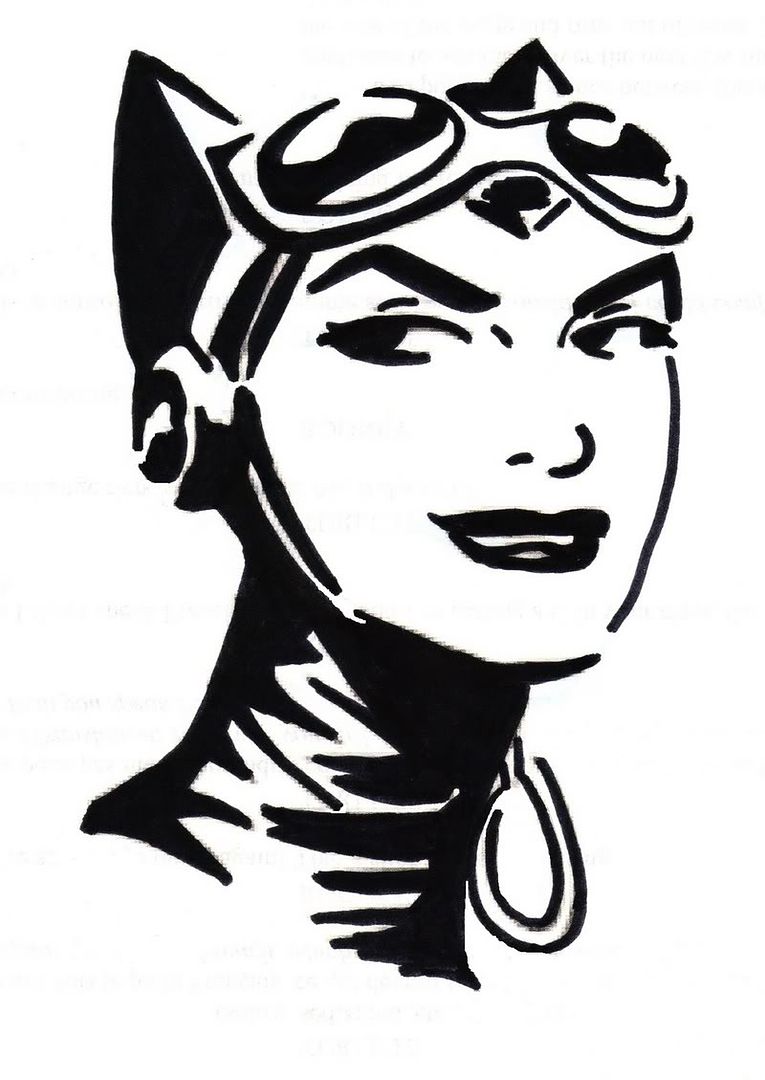
And here's a copy of the stencil I used in the picture above. I made it from a sketch by Cameron Stewart, a great comic book artist, of Catwoman.
Go, go, go!

I am almost there on my "not quite Something Red" sweater. I have the bottom of the second sleeve, then some blocking. I'm not 100% happy with it, but this is what happens when I go it totally without a pattern. I always think I can do better. I put the buttons on the front so I could see what they look like, but I am contemplating getting different ones. I'm not sure yet. I sort of just want to finish so I can talk about something else!
Tuesday, September 05, 2006
Shopping Spree
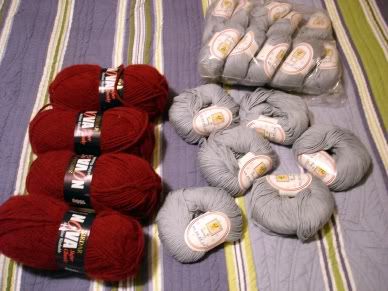
As I mentioned before, Michelle and I went to the Hub Mills Classic Elite yarn outlet last week. It was intense. They had lots of deals on Classic Elite yarns, including cones and mill samples. They also carry Sirdar, Stacy Charles, Cascade, Brown Sheep, and GGH. I ended up getting four balls of red Sirdar Nova (they were the same dye lot as some balls I had bought in Rochester last winter, so I thought that they were fated to come home with me) and sixteen balls of Patina samples (only 3.50 USD for over 100 yds of a cotton/silk blend) in a light blue color. I'm not totally sure what they will become, though I am thinking of making another of this sweater with the Patina. Michelle picked up some bright yellow and orange cotton for a baby sweater, a cone of cotton laceweight, and a cone of some interesting white yarn that she's going to do some dyeing experiments on. A good time was had by all.
Subscribe to:
Posts (Atom)
